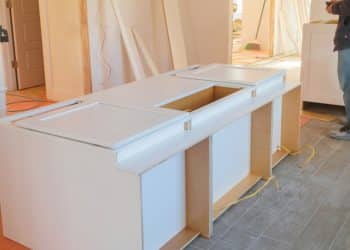


Creating practical furniture at home can feel intimidating at first, but a simple bench project is one of the best ways to build confidence with tools and basic woodworking. A well designed entryway bench adds storage, keeps shoes organized, and gives guests a welcoming first impression when they walk through the door. The best part is that you do not need expensive materials or professional experience to make something that looks polished and useful. A DIY mudroom bench can be completed over a weekend with careful planning and a little patience. Once finished, you will have a custom piece that fits your space perfectly while adding warmth and character to your home.
Planning Your DIY mudroom bench
Before buying supplies, take time to think about how the bench will be used every day. Some homeowners only need a place to sit while putting on shoes, while others want baskets, hooks, or cubbies for extra storage. Consider the size of your entryway and how much walking space should remain after installation. Sketching a rough design on paper helps avoid mistakes later during construction. A DIY mudroom bench works best when it balances comfort, storage, and durability without making the room feel crowded. Simple rectangular designs are often the easiest to build and usually match a wide range of interior styles.
Choosing Materials for Your DIY mudroom bench
Wood selection plays a major role in how sturdy and attractive the final project becomes. Pine is one of the most popular options because it is affordable, easy to cut, and available at nearly every hardware store. Plywood can also work well for hidden sections or interior supports. If you want a more upscale appearance, oak or maple creates a richer finish but costs more and can be harder to work with. When building a DIY mudroom bench, do not forget about screws, wood glue, sandpaper, primer, and paint or stain. Purchasing quality materials at the start often prevents repairs and frustration later.

Measuring the Space Carefully
Accurate measurements make the difference between a bench that fits naturally and one that feels awkward in the room. Measure the width of the wall where the bench will sit and leave enough room around doors or nearby furniture. Most benches are between 18 and 20 inches tall because that height feels comfortable for sitting. Depth is also important since overly deep seating can make a hallway feel narrow. A DIY mudroom bench should improve the flow of the room rather than block it. Double checking measurements before cutting wood saves money and prevents unnecessary rebuilding during the project.
Cutting and Building the Frame
The frame acts as the backbone of the entire structure, so precision matters during assembly. Start by cutting the wood pieces according to your measurements and label them clearly to avoid confusion later. A circular saw or miter saw can make the process faster and cleaner, though a basic hand saw can still get the job done with patience. Once the pieces are ready, assemble the base using screws and wood glue for extra strength. Building a DIY mudroom bench becomes much easier when the frame is square and stable from the beginning. Use clamps if needed to keep everything aligned during installation.
Securing the Seat Properly
After the frame is complete, attach the top seating surface securely so it can handle daily use. Many people use a thick wooden board or plywood topped with trim for a cleaner appearance. Before fastening the seat, check for wobbling or uneven corners in the structure below. Reinforcing weak spots now is easier than repairing damage later. A DIY mudroom bench should feel solid when someone sits on it, not shaky or unstable. Countersinking screws slightly below the surface creates a smoother finish and makes sanding easier before painting or staining the wood for its final appearance.

Adding Storage and Comfort
Storage features can turn a simple bench into one of the most practical pieces in the home. Open cubbies underneath are ideal for shoes, baskets, or sports gear, while drawers help hide clutter more neatly. Some homeowners also add hooks above the bench for coats, backpacks, and scarves. If comfort is important, consider adding a cushion covered in durable fabric that can handle heavy daily use. A DIY mudroom bench becomes even more inviting when it encourages family members to stay organized without much effort. Functional details often matter more than decorative extras in high traffic spaces like entryways.
Sanding and Finishing the Surface
Sanding is one step that beginners often rush through, yet it has a huge impact on the final appearance. Start with coarse sandpaper to smooth rough edges and then switch to finer grits for a polished texture. Pay extra attention to corners and edges where splinters may remain after cutting. Once sanding is complete, wipe away dust with a damp cloth before applying paint or stain. A DIY mudroom bench can look surprisingly professional when the finish is smooth and even. Neutral paint colors remain popular because they blend easily with changing decor styles throughout the year.
Painting or Staining for Style
The finish you choose should reflect both your personal style and the amount of maintenance you are willing to handle. Painted benches create a bright and clean appearance, especially in white, gray, or soft earthy tones. Wood stain, on the other hand, highlights natural grain patterns and gives the project a warmer, more rustic feeling. Applying a protective topcoat helps prevent scratches, stains, and moisture damage over time. A DIY mudroom bench placed near an exterior door will experience constant wear from shoes, bags, and seasonal weather. Durable finishes help preserve the furniture for years of regular family use.

Styling the Finished Bench
Once construction is complete, decorating the area around the bench helps tie the whole room together. Throw pillows, woven baskets, and wall hooks can make the entryway feel welcoming without adding clutter. A nearby mirror also works well because it reflects light and creates the illusion of more space. Plants or framed artwork can add personality while keeping the area functional. A DIY mudroom bench often becomes the visual centerpiece of an entryway, especially when paired with thoughtful decor choices. Keeping accessories simple prevents the room from feeling overcrowded and allows the craftsmanship of the bench to stand out naturally.
Common Mistakes to Avoid
Many first time builders run into problems simply because they rush through important steps. Skipping measurements, using weak screws, or ignoring uneven flooring can all create issues later. Another common mistake is overcomplicating the design during the first project. Starting simple usually leads to better results and less frustration overall. A DIY mudroom bench does not need advanced carpentry techniques to look attractive and function well. Taking time to pre drill holes can also prevent wood from splitting during assembly. Patience throughout the process usually produces stronger construction and a cleaner final appearance than trying to finish everything too quickly.
Maintaining Your Bench Over Time
Even sturdy furniture benefits from regular maintenance, especially in busy households with children or pets. Wipe dirt and moisture away frequently to prevent long term wear on the finish. If the bench includes cushions, washable covers make cleaning easier and help keep the space looking fresh. Tighten loose screws every few months to maintain stability and avoid wobbling. A DIY mudroom bench can remain useful for many years when properly maintained and protected from excessive moisture or heavy impacts. Small touch ups to paint or stain over time also help preserve the original appearance and prevent visible signs of damage.
Building furniture yourself creates a sense of satisfaction that store bought pieces rarely provide. Beyond saving money, handmade projects allow you to customize dimensions, colors, and storage features according to your family’s needs. Even if the first attempt is not perfect, the experience teaches valuable skills that can inspire future woodworking projects around the home. A DIY mudroom bench is an excellent starting point because it combines function, style, and beginner friendly construction techniques in one rewarding build. With careful planning, quality materials, and steady effort, you can create a durable piece that improves your entryway while adding a personal touch that reflects your creativity.
Do you want more amazing tips for DIY Projects in your home? Then visit our DIY Projects page right here