Building DIY closet shelves doesn’t have to be a huge hassle, if you know how to start. Before you even think about grabbing a saw, let’s get the planning phase sorted out. It’s like drawing a map before you go on a trip – you wouldn’t just start driving, right? Taking a little time now will save you headaches later. We’re going to figure out exactly what your closet needs and how to make it work best for you.
Assess Your Closet Space
First things first, you need to really look at your closet. What are you trying to store in there? Is it mostly folded clothes, shoes, cleaning supplies, or maybe a mix of everything? Think about the size and shape of your closet too. Is it deep or shallow? Tall or short? Knowing these details helps a lot. For example, a deep closet might need shelves that aren’t too deep, so you don’t lose things in the back. A shallow one might benefit from taller shelves.
- Measure the width, height, and depth. Don’t forget to note where the door swings and if there are any awkward corners or pipes.
- Consider what you’ll store. This dictates shelf height and depth.
- Think about accessibility. Do you need things you use often to be at eye level?
Brainstorm Shelf Layouts
Now that you know your space, let’s dream up some shelf ideas. There’s no one-size-fits-all here. You can go for one long shelf across the top, or several smaller shelves. Maybe you want shelves on one side and a hanging rod on the other. Some people like to have a few shelves for folded items and then some taller sections for bins or shoes. Don’t be afraid to sketch out a few different options on paper. It helps to visualize what might work best.
Here are a few common layouts:
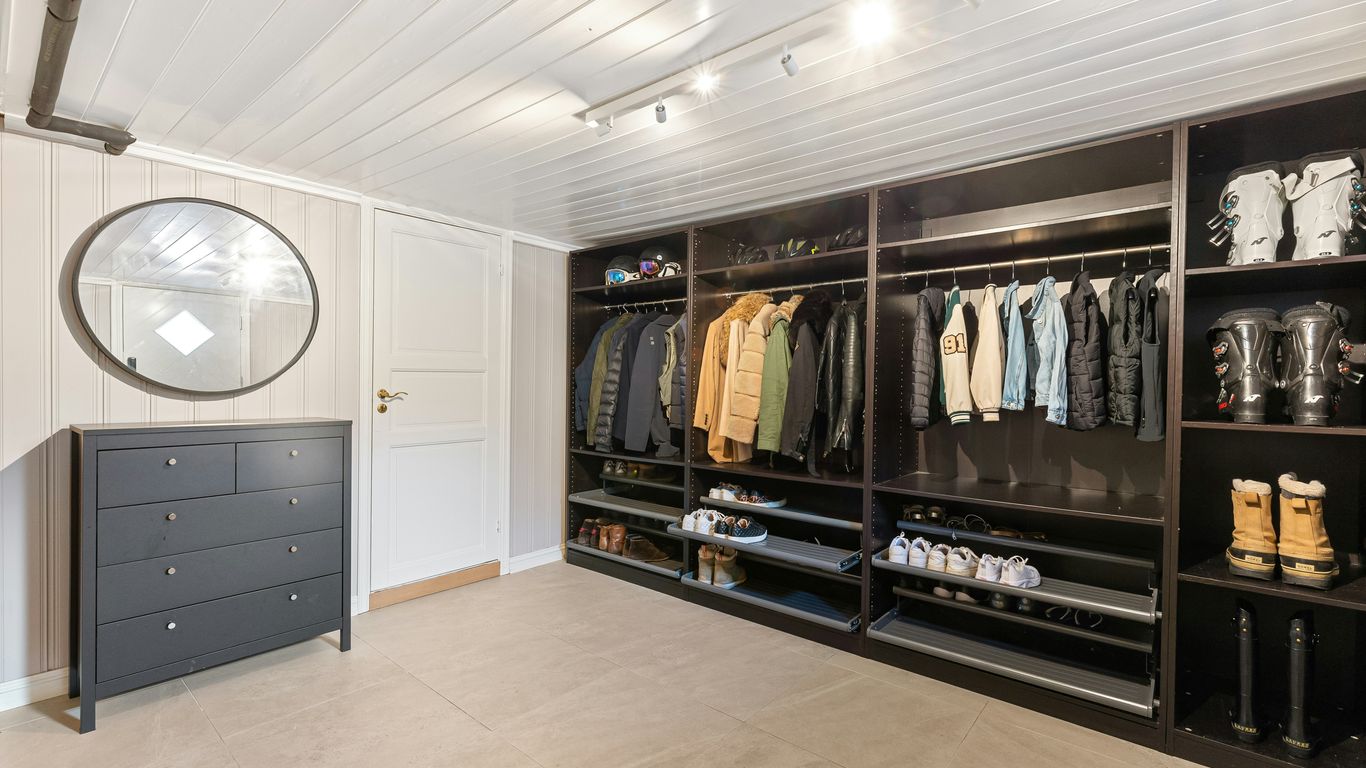
- Full Wall Shelving: Shelves cover the entire width of the closet. Great for maximizing storage.
- Upper Shelf with Hanging Rod: A single shelf near the top for less-used items, with a rod below for clothes.
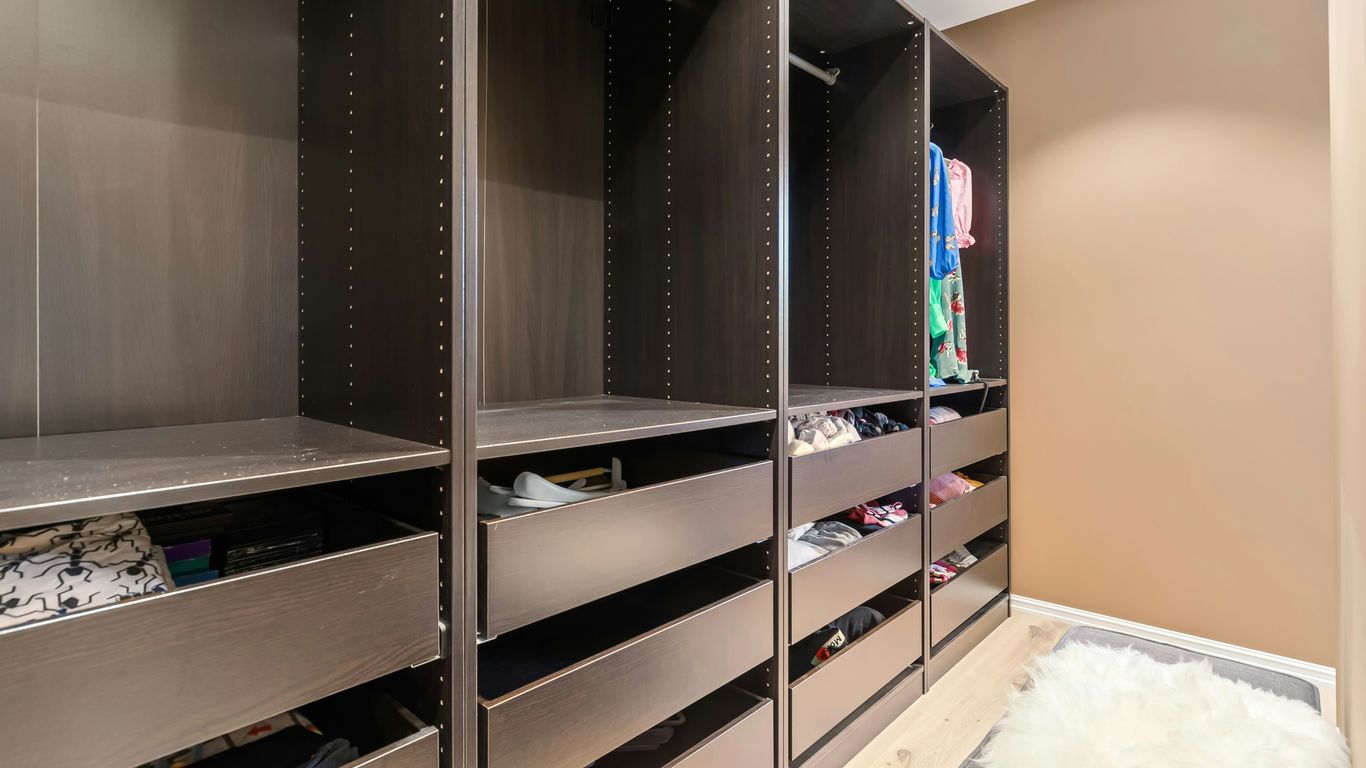
- Sectioned Shelving: Dividing the closet into different zones, like shelves for shoes on the bottom and folded clothes higher up.
Planning the layout is where you get to be creative. Think about how you use your closet daily and design it to make your life easier. A well-planned shelf system can really transform a messy closet into an organized haven.
Measure For Your Shelves
This is where we get precise. Once you have a layout in mind, you need to take exact measurements. Accurate measurements are key to building shelves that fit perfectly. You’ll measure the width, height, and depth for each shelf you plan to install. Remember to account for the thickness of the wood you’ll be using. It’s always a good idea to measure twice and cut once, as they say. This step is critical for building sturdy closet shelves that won’t wobble or look out of place.
Gathering Materials For Your Shelves
Alright, so you’ve got a plan for your closet shelves, which is awesome! Now comes the fun part: getting everything you need to actually build them. Don’t worry, we’re keeping it simple. You don’t need a fancy workshop or a ton of specialized tools for this project.
Choosing The Right Wood
When it comes to wood, plywood is usually the go-to for shelves like these. It’s strong, relatively inexpensive, and easy to work with. You’ll want to pick a good quality plywood, maybe something like radiata pine if it’s available and fits your budget. For the main shelf boards, a 3/4-inch thickness is a solid choice. If you’re building frames around the shelves for extra support, you might use strips of 1×4 or 1×2 lumber. Sometimes, people use scrap wood for the frames, which is a great way to save money if you have some lying around.
- Plywood: Look for 3/4-inch thickness for the shelf surfaces.
- Lumber: 1×4 or 1×2 boards are good for framing and support braces.
- Consider: Using scrap wood for frames can be budget-friendly.
Essential Tools You’ll Need
Most of these tools you might already have, or they’re pretty standard for DIY projects. You’ll definitely need a way to measure accurately, like a tape measure and a pencil. A level is super important to make sure your shelves aren’t wonky. For cutting, a circular saw or a table saw will do the trick. You’ll also need a drill for making pilot holes and driving screws, and a stud finder is a must for attaching your shelves securely to the wall. Safety glasses are a no-brainer, always protect those eyes!
Hardware For Sturdy Shelves
Screws are your best friend here. You’ll want a good supply of wood screws in various lengths. For attaching shelf frames to the plywood, shorter screws work well. When you’re screwing into wall studs, longer screws (like 3-inch ones) are necessary to make sure everything is held tight. Wood glue is also a great addition; a little bit applied before screwing pieces together adds a lot of strength.
If you plan on filling any gaps or nail holes later, wood filler and sandpaper will be handy for a smooth finish. For attaching support braces to the wall, you’ll want screws that are long enough to go through the brace and securely into the wall studs. Attaching shelves securely is key to their longevity.
Remember, the goal is to build shelves that are both functional and strong. Taking a little extra time to gather the right materials and tools now will save you headaches later and result in a much better finished product.
Cutting And Assembling Your Shelves
Alright, now for the fun part – actually building the shelves! This is where your measurements and plans really come to life. Don’t worry if it feels a little daunting; we’ll take it step-by-step.
Cutting Boards To Size
First things first, you need to get your wood cut to the dimensions you figured out during the planning phase. If you bought pre-cut boards, awesome! If not, you’ll need to do the cutting yourself. A circular saw or a miter saw works great for this. Make sure you measure twice and cut once – it’s a cliché for a reason! Accuracy here makes everything else so much easier.
- Shelf Tops/Bottoms: Cut these to the exact width and depth you need for each shelf.
- Frame Supports (Front/Back/Sides): These will form the structure of your shelves. Cut them to match the dimensions of your shelf tops/bottoms, keeping in mind how they’ll fit together.
- Support Brackets: If you’re using them, cut these to the size needed to attach to the wall and support the shelves.
Remember that walls are rarely perfectly square. When cutting your shelf pieces, it’s often best to measure the actual opening in the closet for each shelf and cut accordingly. This little trick saves a lot of frustration later on.
Building The Shelf Frames
Now, let’s put those cut pieces together. For each shelf, you’ll typically build a frame. This usually involves attaching the front, back, and side pieces to the underside of your shelf board. Wood glue and screws are your best friends here. Pre-drilling pilot holes is a good idea, especially near the edges of the wood, to prevent splitting. You can use pocket screws for a really strong joint, or just regular wood screws.
If you’re building shelves that go all the way to the wall, you’ll want to make sure the frame is snug. For shelves that are standalone or attach to the wall at the back, the frame provides the rigidity. We’re aiming for sturdy, not wobbly!
Creating Support Brackets
These are what will hold your shelves up. Depending on your design, these might be simple L-shaped brackets or longer pieces of wood that attach directly to the wall studs. If you’re using 1×4 boards as supports that sit directly on the wall, you’ll cut them to the desired length for each shelf. Attaching these securely to wall studs is key for a strong shelf system. You’ll use long screws to go through the bracket and deep into the studs.
If your shelf design involves a frame that attaches to the wall, you might be building out a lip or ledge for the shelf to rest on. For any shelf that’s particularly long, consider adding an extra bracket or support in the middle to prevent sagging over time. You can find some great ideas for attaching wall shelves if you need more inspiration on bracket styles.
Here’s a quick look at common bracket materials:
| Material | Typical Use |
|---|---|
| 1×4 Lumber | Direct wall support, simple ledges |
| Plywood Scraps | Custom L-brackets, reinforcing corners |
| Metal Brackets | Heavy-duty support, adjustable systems (less common for simple DIY) |
Take your time with this stage. Getting the frames and supports built correctly now will make the installation process much smoother.
Installing Your New Diy Closet Shelves
Alright, the fun part is almost here – getting those shelves up on the wall! This is where all your measuring and cutting really pays off. Making sure your shelves are level and securely attached is key to a long-lasting storage solution.
Locating Wall Studs
Before you can attach anything, you need to find those wall studs. These are the vertical wooden beams inside your walls that provide a solid anchor point. You don’t want to just screw shelves into drywall; they won’t hold much weight. A stud finder is your best friend here. Just run it along the wall where you plan to put your shelves, and it’ll beep or light up when it finds a stud. Mark these spots lightly with a pencil.
- Use a stud finder to locate studs.
- Mark the center of each stud.
- Aim for studs that align with your shelf placement.
Attaching Support Braces
Now, let’s get those supports in place. These are often simple pieces of wood, like 1x4s, that will hold up your main shelves. You’ll pre-drill holes in these braces and then screw them directly into the studs you just marked. Use a level to make sure each brace is perfectly straight before you screw it in. This is super important for preventing wobbly shelves later on. You’ll likely use 3-inch screws for this, making sure they go deep into the studs for a strong hold.
Remember, walls aren’t always perfectly straight, so using a level on your braces is non-negotiable. It’s better to take an extra minute now than deal with crooked shelves later.
Securing The Shelves
With your support braces in place, it’s time to attach the actual shelves. Depending on your design, you might be screwing the shelf frames directly into the wall braces, or perhaps the shelves will rest on top of the braces. Again, use your level to check that each shelf is sitting straight before you fasten it down. Use wood screws that are long enough to go through your shelf material and securely into the support braces or wall studs.
If you’re building L-shaped shelves, you’ll attach the frame to the wall first, then add the shelf board. For a sturdy setup, consider using wood glue along with screws where pieces join. You can find more details on installing closet shelves.
Here’s a quick rundown of what to do:
- Position your shelf or shelf frame onto the installed braces.
- Use a level to confirm it’s straight.
- Pre-drill pilot holes through the shelf and into the braces/studs.
- Drive in wood screws to secure the shelf firmly.
Finishing Touches For Your Shelves
Now that your shelves are built and installed, it’s time to make them look really nice. This is where you can really personalize your new storage space and make it feel complete.
Staining Or Painting Your Shelves
This is your chance to pick a color that matches your room or just something you really like. You can go with a classic wood stain to show off the grain, or a bold paint color to add some personality. Water-based finishes are great because they dry fast and don’t have a strong smell, meaning you could potentially build, finish, and install your shelves all in the same day. We used a golden oak stain and a water-based polyurethane on ours, and it worked out great.
- Stain: Brings out the natural wood grain.
- Paint: Offers a wide range of color options.
- Sealer: Protects the wood and finish.
Adding Trim For A Finished Look
To give your shelves a more professional and polished appearance, consider adding trim. You can attach thin strips of wood or paneling to the front edges of the shelves. This covers up the raw plywood edges and gives a cleaner line. Use construction adhesive and small nails or brads to secure the trim. After it’s attached, you’ll want to fill any nail holes with wood filler and sand everything smooth. Caulking along the edges before painting can also hide small gaps.
Installing A Closet Rod
If your closet design includes space for hanging clothes, now’s the time to put in a closet rod. Make sure it’s securely attached to the wall studs or to sturdy shelf supports. You can buy pre-made closet rods or use a strong dowel. Measure carefully to ensure clothes won’t drag on the floor or the shelf below. This step really helps in maximizing usability of your closet space.
Don’t forget to fill any screw holes or gaps with wood filler and sand them smooth before you paint or stain. This small step makes a big difference in the final look.
Enjoying Your Organized Space
Maximizing Storage Potential
Now that your shelves are up and looking great, it’s time for the fun part: filling them! Think about how much more you can fit into your closet now. Those high, unused spaces are now prime real estate for things you don’t need every day. Don’t be afraid to stack items neatly. You might be surprised at how much more your closet can hold when everything has its own designated spot.
Storing Linens and Totes
Your new shelves are perfect for keeping linens tidy. Folded sheets, extra blankets, and towels can be stacked neatly, preventing that messy pile-up that used to happen. For items you don’t use often, like seasonal bedding or extra blankets, consider using storage totes. Placing these on the higher shelves keeps them out of the way but still accessible when you need them. It’s a great way to keep your closet looking clean and uncluttered.
Keeping Your Closet Tidy
Maintaining your organized closet is all about habit. Try to put things back where they belong right after you use them. A quick tidy-up at the end of each week can make a big difference. If you notice things starting to get messy, take a few minutes to rearrange. A well-organized closet not only looks good but also makes it easier to find what you need, saving you time and frustration.
A little bit of planning and effort goes a long way in making your closet a functional and pleasant space. It’s amazing how much better you feel when your belongings are neatly arranged and easy to access.
You Did It!
So there you have it! You’ve taken a messy, underused closet and turned it into a super organized space. It’s pretty cool how a few pieces of wood and some basic tools can make such a big difference, right? Now you can actually find what you need without digging through a pile. Plus, it just looks so much better. Go ahead, admire your handiwork – you earned it!