You’re looking to update cabinet handles and give your old furniture a facelift. It’s a fantastic idea, and honestly, one of the easiest ways to make a big impact without a ton of work. But before you go grabbing the first shiny thing you see, let’s chat about how to pick the perfect ones. It’s not just about looks; there’s a bit more to it.
Consider The Style Of Your Furniture
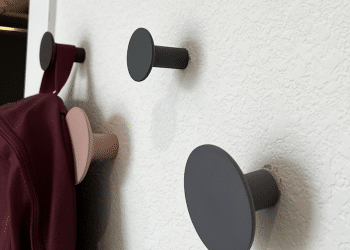
First off, think about the furniture itself. Is it a chunky, rustic farmhouse table, a sleek mid-century modern dresser, or something else entirely? The handles should feel like they belong. For classic or rustic pieces, you might lean towards something with a bit of character, like antique brass, wrought iron, or even ceramic with a subtle pattern. If your furniture has that clean, simple vibe from the 1950s or 60s, plain metal or lacquered wood handles often fit right in. And for a modern look? Black, gold, or even some cool leather options can add a nice contrast.
Size And Proportion Matter
This is where things can get a little tricky, but it’s super important. Getting the size and proportion right makes a huge difference. Imagine putting tiny little knobs on a massive cabinet door – it just looks off, right? Or a giant, chunky handle on a delicate little jewelry box. You need to think about the scale of your furniture. For larger doors or drawers that get a lot of use, a longer bar handle can be more comfortable and look more balanced.
For smaller drawers or single doors, a knob might be just the ticket. It’s also really important to measure the distance between any existing holes if you’re replacing handles on a piece with pre-drilled spots. Standard measurements exist, but older furniture can be a bit quirky, so always double-check.
Here’s a quick guide:
- Knobs: Great for single doors or small drawers. Easy to install and work with almost any style.
- Bar Handles: Ideal for larger cabinets and drawers. Offer a good grip and a more contemporary feel.
- Recessed Pulls: These are built into the furniture, perfect for a minimalist look or sliding doors.
Functionality Is Key
Beyond how they look, think about how you’ll actually use them. Are these for a kitchen cabinet that gets opened a dozen times a day, or a decorative piece in the living room? If it’s high-traffic, you want something comfortable to grip. Sharp edges or awkward shapes can become annoying pretty quickly. Consider the material too – some finishes are easier to clean than others, which is a big plus for kitchen or bathroom furniture. Comfort and ease of use should never be an afterthought.
Sometimes, the simplest changes have the biggest effect. Swapping out old hardware is a prime example. It’s a small detail, but it can totally change the feel of a piece of furniture and, by extension, the room it’s in.
Selecting Materials And Finishes
Handles For Classic Or Rustic Furniture
When you’ve got furniture that leans towards classic or rustic styles, you’ll want hardware that matches that vibe. Think about materials that have a bit of history or a natural feel to them. For a classic look, aged brass or bronze can really bring out the elegance. They have a warm glow that just feels right on older pieces. If your furniture is more on the rustic side, maybe something with a bit of texture or a natural element would be good.
Ceramic knobs with a hand-painted design or even carved wood handles can add a lot of character. These materials often have a slightly imperfect look, which is exactly what you want for that authentic, lived-in feel. Don’t be afraid to mix and match a little, but keep the overall style in mind.
Handles For Mid-Twentieth Century Furniture
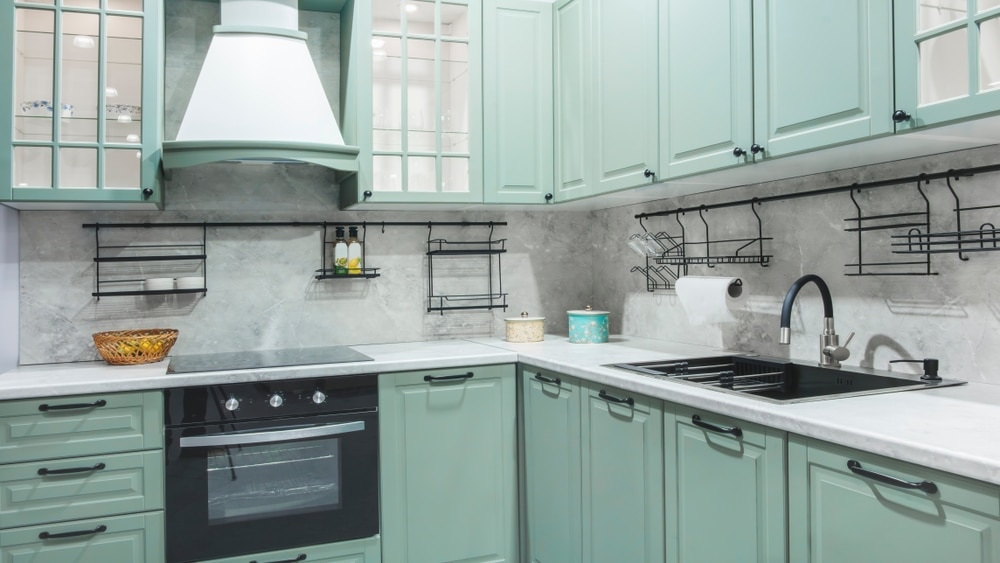
Mid-century modern furniture often has clean lines and a focus on functionality. For this style, you’ll typically see hardware made from materials like brushed nickel, chrome, or even some of the newer plastics that mimic metal. These finishes tend to be sleek and understated. Think about simple bar pulls or round knobs with a minimalist design. The key here is to keep it clean and uncluttered. You don’t want anything too ornate or fussy. Materials like aluminum or stainless steel also fit well because they have that modern, durable feel. It’s all about complementing the furniture’s design without overpowering it.
Handles For A Modern Touch
If you’re going for a contemporary or modern look, you have a lot of options. Sleek, minimalist designs are usually the way to go. Matte black finishes are super popular right now and can add a sharp, sophisticated edge to cabinets. Brushed or polished nickel, stainless steel, and even glass can work well. For a bolder statement, consider geometric shapes or hardware with a unique texture. Sometimes, a simple, oversized pull in a striking finish can really make a piece stand out. The goal is often a clean, streamlined appearance that feels current and fresh. You might also look at materials like acrylic or even leather for a more unexpected, high-end feel.
How To Update Cabinet Handles: A Step-By-Step Guide
So, you’ve picked out some snazzy new handles and you’re ready to give your old furniture a facelift. Awesome! It’s actually a pretty straightforward process, and honestly, it’s one of the easiest ways to make a big difference without a ton of work. Let’s get this done.
Gather Your Tools And Materials
Before you start unscrewing anything, make sure you have everything you need. It’s no fun to be halfway through and realize you’re missing a screwdriver. You’ll want:
- New cabinet handles or knobs: Obviously!
- Screwdriver: Usually a Phillips head works, but check your old hardware. Sometimes a flathead is needed.
- Tape measure: For checking distances and marking.
- Pencil: To mark where new holes might go.
- Level: Super helpful for making sure everything is straight.
- Drill and drill bits (optional): Only if you need to make new holes.
- Wood filler (optional): If your new handles don’t line up with old holes.
- A soft cloth: To protect the furniture surface.
Remove Old Hardware
This is the easy part. Just grab your screwdriver and start unscrewing the old knobs or handles. Most of the time, they’re attached with just one or two screws from the inside of the cabinet door or drawer. Keep a little container handy for the old hardware – you might want to save it for another project or donate it.
Measure And Mark For New Holes
This is where being a little careful pays off. If your new handles have the same screw hole spacing as the old ones, you’re golden. Just measure the distance between the centers of the holes on your new hardware. If it matches, you can probably just use the existing holes. If the spacing is different, or if you’re installing hardware on a piece that didn’t have any before, you’ll need to mark new spots. Use your tape measure and pencil to mark where the new holes should go. Using a level here is a game-changer to make sure everything looks straight and even, especially if you have multiple drawers or doors in a row.
Install Your New Handles
Now for the fun part! Line up your new handle with the holes (either the old ones or the new ones you just marked). Insert the screws from the inside of the door or drawer. On the outside, start screwing on the handle. Don’t tighten them all the way just yet. Once all the screws for a handle are in place, you can go back and tighten them firmly.
Be careful not to overtighten, as this can strip the screw hole or even damage the wood. Give the handle a little wiggle to make sure it’s secure. Then, open and close the drawer or door a few times to check that it moves freely and the handle doesn’t get in the way.
A little tip: If you’re working with older furniture, sometimes the wood can be a bit soft. Go slow when tightening screws. You want them snug, not cranked down with all your might. It’s better to have a slightly loose handle you can re-tighten later than a damaged cabinet.
Dealing With Common Issues When You Update Cabinet Handles
Sometimes, even with the best plans, things don’t go perfectly when you’re swapping out old hardware for new. It’s pretty common to run into a few snags, but don’t let that stop you! Most of these little problems have simple fixes.
When The Holes Do Not Match
This is probably the most frequent issue people face. You’ve got your shiny new handles, but the screw holes on the furniture just don’t line up. It can be a bit frustrating, especially if you were hoping for a quick swap. The good news is, this is totally fixable.
Here’s what you can do:
- Fill and Redrill: The most common solution is to fill the old holes. You can use wood filler or even a mix of sawdust and wood glue for a good match. Let it dry completely, then sand it smooth. After that, you’ll need to carefully measure and mark where the new holes should go. Using a level is super important here to make sure everything looks straight.
- Consider Backplates: Some new handles come with decorative backplates. These can cover up old holes that don’t quite line up, saving you the trouble of filling and redrilling.
- Adjustable Hardware: For some styles, you can find hardware with adjustable mounting points, which can give you a little wiggle room.
Securing Loose Hardware
Once your new handles are on, you want them to feel solid. If a handle feels a bit wobbly or loose, it’s usually because the screws aren’t quite tight enough or the holes are a bit worn. You don’t want handles that jiggle every time you open a drawer!
- Tighten Screws: First, try gently tightening the screws from the inside. Be careful not to overtighten, as this can damage the wood or strip the screw head.
- Use Thread Sealant or Tape: If tightening doesn’t help, you can try adding a bit of thread sealant or even a wrap of Teflon tape around the screw threads. This adds a little extra grip.
- Slightly Longer Screws: Sometimes, a screw that’s just a tiny bit longer can make all the difference in getting a secure fit, especially if the original holes were a bit shallow.
Addressing Stripped Screws
Ah, the dreaded stripped screw. This happens when the head of the screw gets damaged, and your screwdriver just spins without gripping it. It feels like a dead end, but there are tricks.
- The Rubber Band Trick: Place a wide rubber band flat over the stripped screw head. Then, press your screwdriver firmly into the rubber band and screw head. The rubber can give your screwdriver the grip it needs to turn the screw.
- Screw Extractors: For tougher cases, a screw extractor kit is a handy tool to have. You usually drill a small pilot hole into the stripped screw, then use the extractor to grip and remove it.
- Pliers: If the screw head is sticking out enough, you might be able to grip it firmly with a pair of pliers and twist it out.
Dealing with these common issues might seem like a hassle, but they’re usually straightforward fixes. Taking your time and using the right approach will help you get that polished look you’re after. Remember, even experienced DIYers run into these little bumps along the way. It’s all part of the process of updating your cabinets.
It’s always a good idea to have a few basic tools on hand, like a screwdriver set, a drill, wood filler, and maybe some extra screws, just in case. These little problems are often just part of the adventure of giving old furniture a new lease on life.
Preserving The Charm Of Old Furniture
When you’re updating old furniture, it’s easy to get caught up in the excitement of new hardware and forget that the piece has a history. The goal is usually to refresh it, not erase its past. So, how do you make sure your new handles complement, rather than clash with, the existing character?
Don’t Over-Clean the Surface
Sometimes, the little marks and scuffs on a piece of furniture are what give it its unique personality. Think of them as wrinkles on a wise old face – they tell a story. Resist the urge to scrub every inch until it gleams like new. A gentle dusting is usually all that’s needed. If you’re really concerned about grime, a slightly damp cloth can work wonders without stripping away the patina that makes the furniture special. You might even find that a bit of wear adds to the overall appeal, especially if you’re going for a vintage look. For inspiration on refreshing pieces while keeping their soul, check out this vintage wall cabinet makeover.
Use Proper Tools for Fragile Wood
Old wood can be surprisingly delicate. It might look sturdy, but it can be prone to cracking or splintering if you’re not careful. When you’re removing old hardware or installing new pieces, always opt for hand tools over power tools if possible. A manual screwdriver gives you more control than a drill, especially when dealing with screws that might be a bit stubborn. If you do use a power drill, set it to a low torque setting and go slowly. You don’t want to accidentally strip a screw or, worse, split the wood around the hole. Patience is really key here.
Choose Screws of the Correct Size
This might seem like a small detail, but using the right screw size is super important for both the look and the longevity of your update. If the screws are too long, they could poke through the other side of the drawer or cabinet door, which is definitely not the look you’re going for. On the flip side, screws that are too short won’t hold the handle securely, leading to wobbling and potential damage over time.
Always measure the thickness of your cabinet door or drawer front and choose screws that are just the right length to get a firm grip without going too far. Most new handles come with screws, but they might not always be the perfect length for your specific piece. It’s often worth picking up a small assortment of screws in different lengths from your local hardware store just in case.
Final Touches For A Perfect Finish
You’ve done the hard work of picking out and installing your new cabinet handles, and now it’s time for the satisfying part: making sure everything looks just right. It’s these little details that really make the update shine and give your furniture that polished, professional look. Don’t skip this step – it’s where the magic happens!
Review and Adjust the Final Result
Before you pack up your tools, take a good look at each handle you’ve installed. Are they straight? Do they feel secure? Sometimes, even with careful measuring, things can be a tiny bit off. Gently wiggle each handle to check for any looseness. If a handle isn’t perfectly aligned, now is the time to make small adjustments. Loosen the screws just enough to reposition, then retighten them. It’s better to make these minor tweaks now than to live with slightly crooked hardware.
Clean Up Fingerprints and Marks
Installing hardware often means touching surfaces with your hands, and sometimes tools can leave little scuffs. Grab a soft, dry cloth and give each new handle and the surrounding cabinet area a good wipe-down. This removes any fingerprints, dust, or smudges from the installation process. For most finishes, a simple dry cloth is all you need. If you encounter any stubborn marks, a slightly damp cloth with a tiny bit of mild soap can work, but be sure to dry it immediately afterward to prevent water spots.
Maintain Consistency in Style
As you admire your newly updated furniture, think about the overall look you’ve created. Are all the handles the same style and finish? This consistency is key to a cohesive design. If you’ve updated multiple pieces of furniture in the same room, ensure the hardware matches across the board. This uniformity ties everything together, making the space feel more intentional and put-together. It’s the small details like matching hardware finishes that make a big difference in the final appearance of your room.
Wrapping Up
Swapping out old cabinet handles for new ones is a super simple way to give your furniture a fresh look without a lot of fuss or a big price tag. Whether you’re going for a modern vibe or keeping things classic, the right hardware can really make a difference. It’s one of those little projects that makes your home feel more ‘you’. Don’t be afraid to experiment a bit – you might be surprised at how much a small change can brighten things up!