
Fixing little dents or punctures in your drywall might seem intimidating, but with the right mindset and a few tools, you can master the process in less time than you might think. If you’ve ever wanted to learn how professionals achieve smooth, flawless surfaces, this guide will walk you through everything step by step. Whether you live in an apartment or your own home, knowing how to repair small wall holes gives you confidence and keeps your space looking clean and well maintained. Best of all, the techniques are simple enough for any beginner to follow without stress or special experience.
Why Learning to repair small wall holes Matters
Small holes may look harmless, but they can gradually grow or lead to chipped paint and uneven textures. By taking the time to repair small wall holes early, you prevent bigger issues and avoid more costly repairs later. Many homeowners discover that patching small openings helps maintain insulation and reduces drafts. Even tiny imperfections can collect dust, weaken the wall surface, or attract unwanted moisture. Developing this skill also gives you more control over your home improvement projects. Once you know how to repair small wall holes properly, you will rely less on contractors for minor fixes and save both time and money.
Understanding What Causes Small Holes
Before you attempt to repair small wall holes, it helps to understand how these blemishes form. Door handles are frequent culprits, especially when doors swing open too quickly. Nails from hanging art or shelves also leave behind marks that become more noticeable after removing hardware. Kids playing indoors may accidentally poke toys into the drywall. Even moving furniture can scrape or dent the surface. Understanding the source of the hole helps you choose an appropriate repair method. For example, a tiny nail hole requires minimal effort, while a larger puncture from furniture may call for additional steps.
Essential Tools and Materials for a Professional Finish
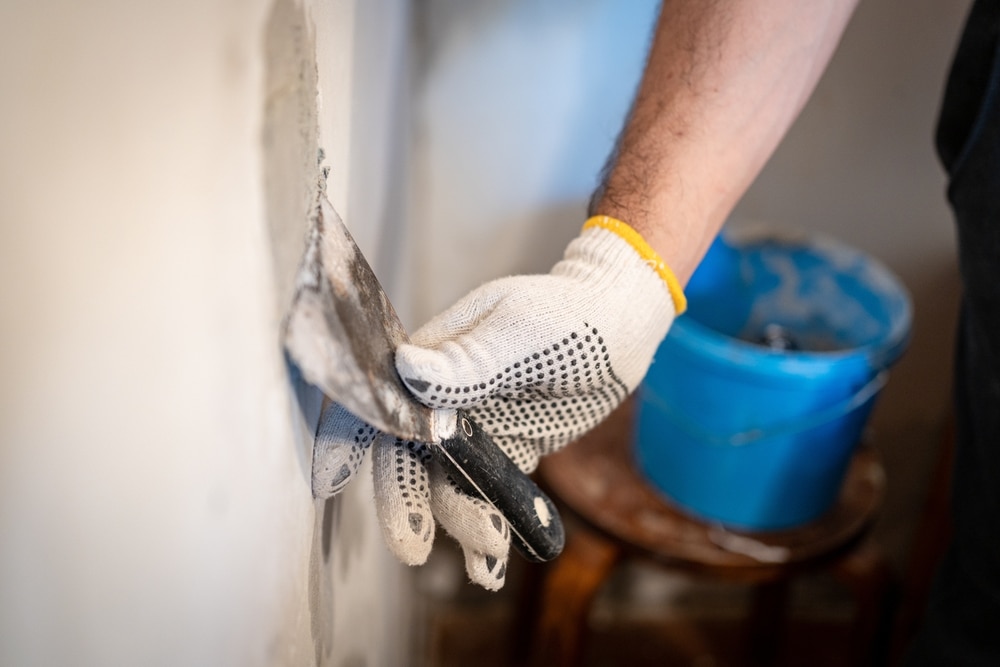
You do not need pricey or complicated tools to repair small wall holes. Most repairs require only basic items such as spackling paste, joint compound, sandpaper, a putty knife, and a patch kit for medium sized holes. A primer and touch up paint ensure the finished area blends seamlessly with the rest of the wall. Make sure the sandpaper is fine grit to produce a smooth surface. For larger openings, consider using a self adhesive mesh patch. With these materials on hand, the process becomes more efficient and your results look cleaner and more polished.
Preparing the Surface Before You repair small wall holes
Good preparation is key to a flawless repair. Start by gently cleaning the area around the hole with a damp cloth. Dirt, dust, and loose debris can prevent compounds from adhering properly. Once the wall is dry, inspect the edges of the opening. If they appear jagged, lightly scrape them with a utility knife to create a clean outline. This ensures the compound fills the gap evenly. Taking time to prepare the surface reduces the risk of bumps or visible ridges later. Many beginners skip this step, but it makes a noticeable difference in the final outcome.
The Step by Step Process to Patch Tiny Holes
For small nail or screw holes, the method to repair small wall holes is surprisingly simple. Begin by applying a small amount of spackling paste to the tip of your putty knife. Press the compound into the hole and smooth the surface with gentle strokes. It should sit flush with the surrounding wall. Allow it to dry according to the instructions on the container. Once dry, use fine grit sandpaper to feather out the edges. If the area still looks slightly indented, apply a second thin layer. Keep the layers light to avoid excess sanding later.
How to Fix Medium Sized Holes Using Patches
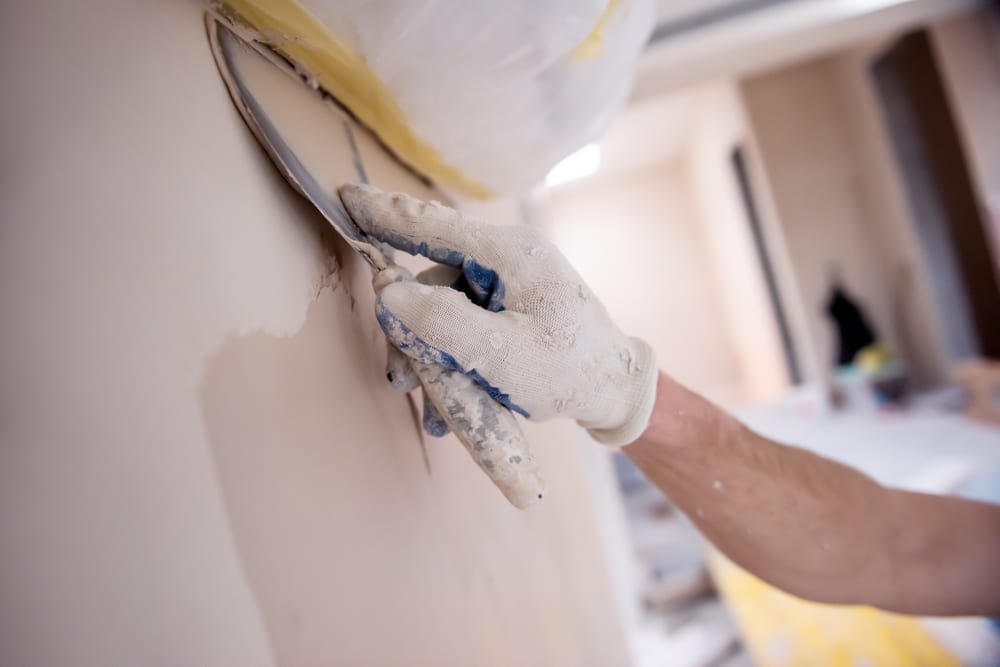
When dealing with larger openings, such as those left by hardware anchors or accidental impacts, you can still repair small wall holes without needing advanced techniques. A mesh patch works well for holes around the size of a coin. Simply peel the backing from the patch and press it over the hole so it adheres firmly. Next, apply a layer of joint compound over the mesh, spreading it outward several inches beyond the patch to create a gradual blend. Once dry, sand lightly and add another thin coat if necessary. The goal is a smooth, undetectable repair that matches the existing wall texture.
Matching Wall Texture for a Seamless Look
After you repair small wall holes, the repaired area must visually blend with the rest of the wall. Different homes feature different textures, including smooth, orange peel, or knockdown patterns. If your wall has a subtle finish, an aerosol texture spray can help you mimic the existing design. For simple surfaces, a light sanding may achieve the desired look. Always practice texture techniques on a piece of cardboard before applying them to the wall. This reduces the chance of creating a noticeable patch. A good texture match can make your repair completely invisible, even under bright lighting.
Priming and Painting for a Professional Appearance
Even if you perfectly repair small wall holes, skipping primer can cause the final paint to absorb differently on the patched area. This results in shiny or dull spots compared to the surrounding wall. Apply a thin layer of primer before painting to ensure consistent color and sheen. After the primer dries, use a small roller or brush to apply your chosen paint. Feather the edges so the new paint blends smoothly. Depending on your wall color and the type of paint, you may need more than one coat. Be patient. A careful finish makes the repair look like it was done by an expert.
Avoiding Common Mistakes When You repair small wall holes
Many people make simple errors that lead to imperfect repairs. Applying too much compound at once creates lumps that are difficult to sand down. Failing to let layers fully dry causes uneven textures. Using coarse sandpaper can damage surrounding paint, creating a bigger project than you intended. Another common mistake is neglecting proper cleaning before beginning. Always take your time. Each stage of the process builds on the previous one, and patience helps ensure success. Once you understand how to avoid these missteps, your confidence grows and your results improve dramatically.
When to Call a Professional Instead
While most homeowners can easily repair small wall holes themselves, there are situations where expert help is worthwhile. If the hole exposes wiring or plumbing, do not attempt repairs on your own. Structural issues, water damage, or crumbling drywall also require professional attention. In such cases, the underlying problem must be addressed before patching the surface. Hiring a specialist ensures the repair is safe and long lasting. Professionals also have access to more advanced tools and can complete complex jobs quickly. Knowing when to seek help saves you time and prevents future complications.
Learning how to repair small wall holes is a valuable skill that helps you maintain a clean, polished living space. With a few affordable tools and a little patience, you can handle most small imperfections without relying on outside help. With practice, anyone can repair small wall holes quickly and confidently. Each time you complete a repair, your confidence grows and your home looks better for it. Whether you are preparing a room for new decor or simply freshening up your walls, taking the initiative to learn this technique pays off. Now that you understand the full process, you can approach your next project with skill and satisfaction.
Are you not done yet? Do you want to learn other ways to improve your DIY skills? Then visit our DIY Projects category page.
