DIY floating shelves are one of the most satisfying home projects you can tackle when you’re trying to upgrade your space without overspending. These shelves blend functionality with an airy, minimalistic style, making them perfect for renters, homeowners, and anyone who loves a clean aesthetic.
This guide walks you through everything from choosing the right materials to installation mistakes to avoid so you can build shelves that actually look store bought. You don’t need professional tools or previous experience to get this right, just some patience and a willingness to try something new. By the end, you’ll be ready to transform any wall.
Why Floating Shelves Are So Popular
Floating shelves offer a clever mix of practicality and style, creating structure without feeling heavy or cluttered. They also work with almost any interior style, from Scandinavian to farmhouse to modern industrial. And because DIY floating shelves allow you to customize everything from color to depth, you get far more creative freedom than you would with store bought shelves.
Tools and Materials You’ll Need for DIY floating shelves
Before you begin, make sure you have all the essentials: a drill, screws, brackets or a hidden mounting system, wood boards, sandpaper, a level, and paint or stain. The simplicity of the materials is one of the reasons people love building DIY floating shelves; you don’t need fancy equipment, just reliable basics. Pick high quality wood, because sturdy boards not only look better but also last longer under weight.
Measuring and Planning Your Layout
Good planning is the difference between professional looking shelves and ones that fall short. Before installing anything, take time to map out exact locations with painter’s tape. This helps you visualize spacing and ensures everything looks balanced. If you’re planning a larger feature wall, you can even sketch it out to see where DIY floating shelves will have the most impact and functionality.
Building Your Shelves Step by Step
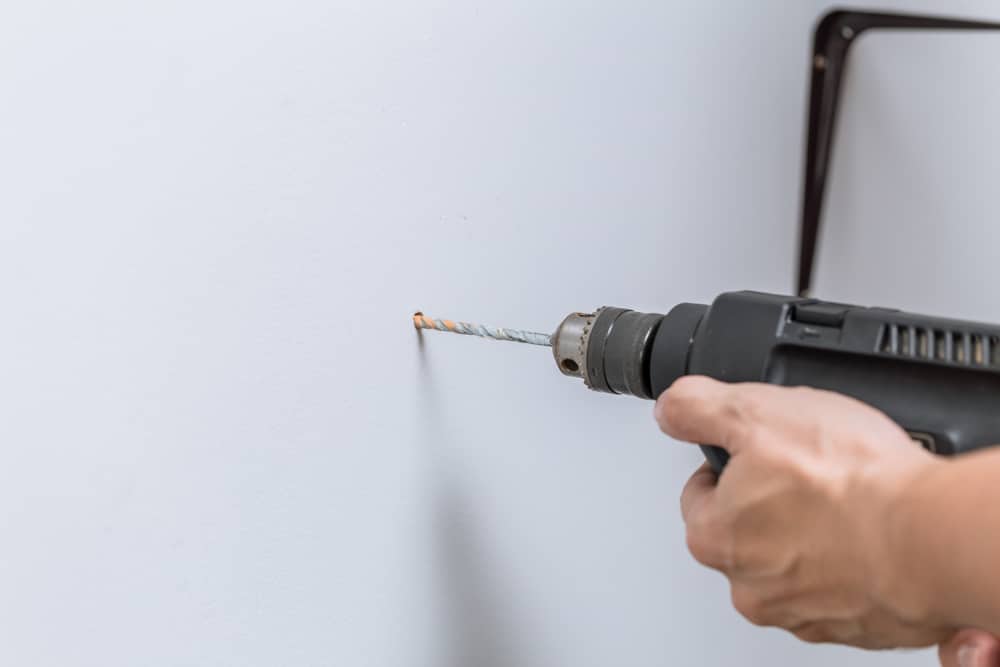
Start by cutting your boards to size or having them cut at a hardware store. Sand the edges thoroughly to avoid splinters, then stain or paint them depending on your style. Let them dry completely before attempting installation. When mounting your brackets, use a stud finder whenever possible so the shelves stay secure. This is especially important for DIY floating shelves that will hold heavier items like books, plants, or ceramics. After attaching the wood to the brackets, double check every angle with a level to make sure nothing tilts.
Safety Tips and Common Mistakes
Safety goggles, gloves, and a steady workspace can prevent common accidents. One of the biggest mistakes people make is rushing through measurements or guessing instead of leveling properly. That’s when DIY floating shelves can end up crooked or unstable. Another mistake is using small screws or poor quality anchors, which increases the risk of sagging later.
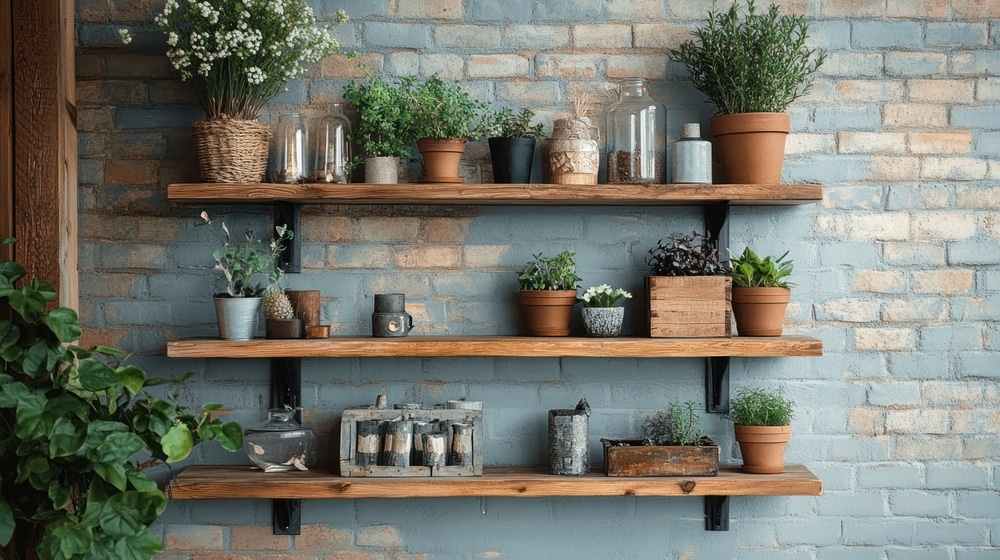
Creative Styling Ideas
Now comes the fun part: styling. Mixing decorative items with functional ones helps your shelves feel balanced and intentional. Plants add life while framed photos bring personality. You can also change the mood of a room by choosing what you display on your DIY floating shelves. Some people like a minimal look, while others prefer a more maximalist feel with layered items. Whichever route you choose, aim for a natural flow by staggering heights and mixing textures.
Budget-Friendly Tips Without Cutting Corners
Building shelves on a budget doesn’t mean you have to sacrifice quality. For example, pine boards cost less but look great when stained. You can also repurpose leftover paint or wood from other projects. One reason people love DIY floating shelves is that you can adapt them to any price range while still getting a polished result. And if you’re trying to keep costs down, consider sourcing brackets in bulk or using reclaimed wood for character.
Troubleshooting Wobbly Installations
If your shelves wobble, don’t panic. The fix is usually simple. Check whether the screws are fully tightened or whether the anchors are loose. Sometimes walls are uneven, which can make even properly installed DIY floating shelves seem unstable. Adding a second anchor or upgrading to a stronger bracket often solves the issue. If the shelf still feels off, remove it and remount while checking every step with a level.
DIY floating shelves are a great entry point into home improvement because they’re simple enough for beginners yet customizable enough for seasoned DIY fans. As long as you plan carefully and use sturdy materials, the end result can rival anything you’d buy at a store. And because they work in bedrooms, bathrooms, kitchens, offices, and living rooms, you’ll never run out of places to use them. By creating your own shelves, you’re not just saving money, you’re shaping your environment in a meaningful way.
In the end, DIY floating shelves give you the freedom to redesign your space exactly how you imagine it. With a bit of effort and creativity, you can build shelves that reflect your personality and add long lasting value to your home. Whether you want minimalist décor or bold displays, these shelves adapt effortlessly to your style. So gather your tools, measure carefully, and dive into the project. Before long, you’ll be admiring your own work and thinking of where to put your next set of DIY floating shelves.
Are you not done yet? Do you want to learn other ways to improve your DIY skills? Then visit our DIY Projects category page.
